Program Templates
Overview
The Templates section is where Administrator manages the Program templates used to standardize how programs are created and billed.
Here Administrator can view all existing templates and quickly check key details such as Name, Type, Status (Active/Inactive), Allowed Payer (e.g., Parent/Student/Any), Duration (Session), and Categories. The filter fields and dropdowns can be used to narrow results, or run a quick search.
Adding a New Program Template
- Navigate to Programs-->Templates in the panel menu on the left.
- Click "Add Template" button in the top-right corner of the page.
- Fill in the fields in the form:
- Name
- Type (default types: before/after care, course, class or customized ones added by the school staff etc.)Class: This indicates that the program offers a class that a student can attend during a scheduled session.
Course: This refers to the program selling a course comprising multiple classes that a student can attend during a scheduled session.
Before/Aftercare: This implies that the program provides packages of one or more classes that a student can attend during a scheduled session.- Allowed Payer (student/parent/any)
- Duration (session/forever)
- Categories (Adding Category User Guideline)
- Description
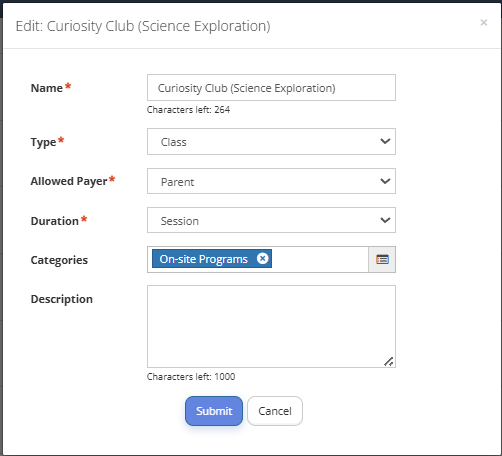
Fig. 1. Filling in the Program Template Form
4. Click "Submit".
5. After submitting a new program template you can assign a pricing list to the template.
6. Click the "Add" button and follow the "Configure Program Billing" user guide.
7. After setting up the pricing list, the Template switches to the "Draft" status. It needs to be further activated. Go to Templates list, select just added template in the "Draft" status, click the context menu to the right of the template and click "Activate".
8. Each program template can be edited or deactivated by clicking the context menu to the right of the specific template and selecting the required action.
9. After the template is set up, Administrator can use it while adding new programs offered by the school.
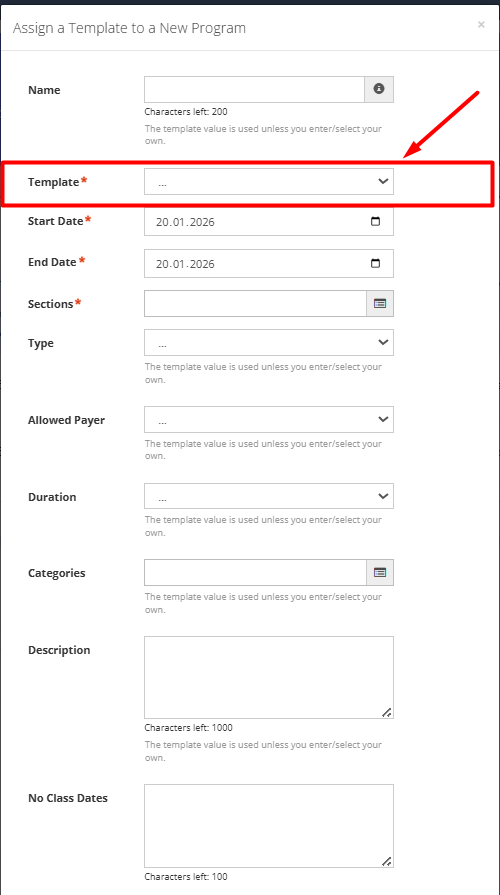
Fig. 2. Selecting Program Template while Adding New Program