ACL (Access Control List) Manager
ACL Manager is a system component used to define and manage who can access specific functionality block within a platform.
In a school or workspace context, an ACL Manager is typically used to ensure that, for example:
- students can view lessons, but cannot edit them;
- Teachers can manage sections and grades;
- Admins can configure settings and manage users.
Thus, the ACL Manager enforces security and role-based access by checking permissions before allowing any action in the system.
ACL Manager Set Up
- In order to set up ACL Manager for the specific workspace template, navigate to Admin -> Workspace Templates.
- Select the required template and click on the context menu button to the right of the template.
- Click on the "ACL Manage" option.
- You will see a list of permissions and a blank block with user types on the right.
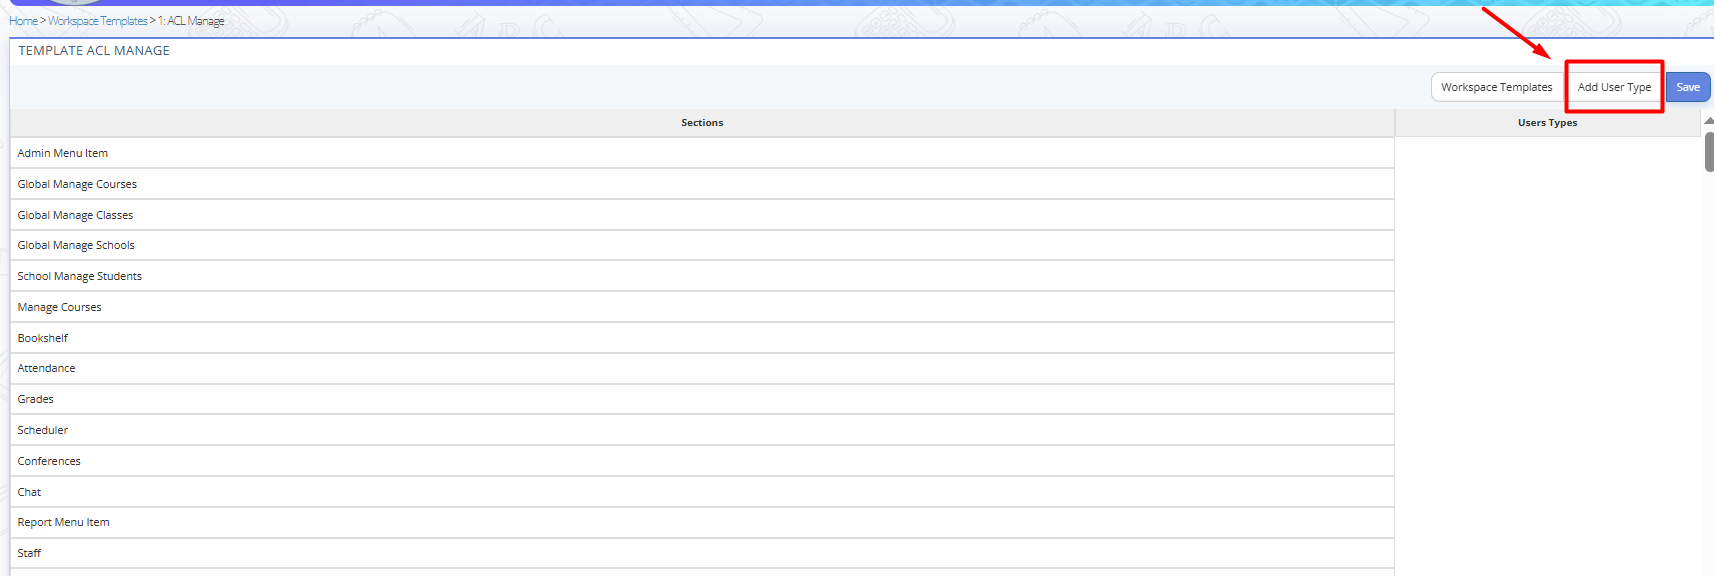
Fig. 1. ACL Manage Page - Click the "Add User Type" button at the top right to add a user type and later assign it as the default user (Owner Role).
- Fill in the fields in the form:
- name;
- indicate whether the user type represents school/staff personnel; - Click "Submit".
- Then go to the workspace templates list, click "Edit" to the right of the draft of the new template, and select this owner role in the bottom list.
- Click "Submit".
- Thus, when a user creates a new workspace he will inherit this role by default.
- Then you can add all other user roles required for a specific school or corporate organization that will have access to the platform.
For example, these may include, but are not limited to:
- Teacher
- Administrator
- Director
- Deputy Director
- Coordinator
- Manager
- Student - To do this, go to the draft of the new workspace template, click the context menu on the right, and select "ACL Manage".
- Click "Add User Type".
- Fill in all fields in the form:
- name;
- indicate whether the user type represents school/staff personnel;
- indicate whether the user type is a student. - Click "Submit".
- Check the necessary permissions according to the added User Types.
- Click the "Submit" button at the top right corner of the page to save the settings.
- Each User Type can be edited or deleted by clicking the gear icon under each user role and selecting the desired action.

Fig. 2. User Type Actions